Before you start: Make sure you have your 13-digit activation code ready (received via email after payment).
Installation Guide
Step-by-step instructions for Activity Recorder & Tracker
Follow these steps to install and configure Activity Recorder & Tracker on your Android device. The entire process takes about 10 minutes.
Step 1: Download the APK file
- Go to the Download page on our website
- Tap the "Download APK" button
- The file will save to your Downloads folder
Step 2: Allow installation from unknown sources
Option A: When prompted during installation (Android 8+)
- Tap the APK file in your Downloads
- If Android shows an "Install blocked" message
- Tap "Settings" → enable "Allow from this source" → go back and install
Option B: Enable manually in Settings (older Android)
- Open Settings → Security
- Find "Unknown Sources" or "Install Unknown Apps"
- Toggle it on

Step 3: Install the APK
- Open your Downloads folder or file manager
- Tap the APK file (
ActivityRecorderTracker.apk) - Tap "Install"
- Wait for installation to complete (about 30 seconds)
Step 4: Open app and enter activation code
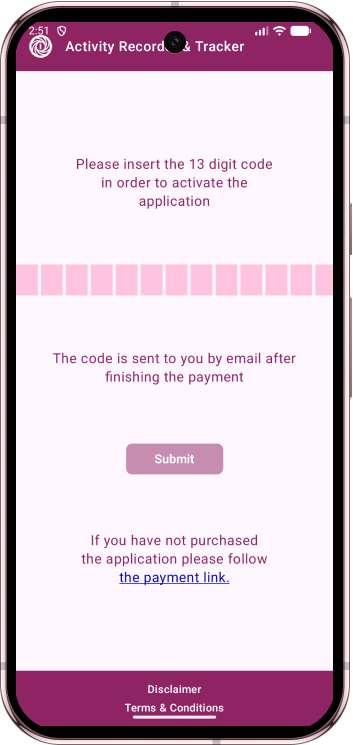
- Tap "Open" when installation finishes
- The app opens to the activation screen
- Enter your 13-digit activation code (from your email)
- Tap "Activate"
Tip: Copy the code from your email and paste it to avoid typos. The code is case-insensitive.
Step 5: Grant basic permissions (one-click)
After activation, the app will request permissions:
- Screen recording
- File storage access
- Camera and microphone (for video mode)
- Internet access
- Enter your device password or PIN when prompted
- Android will grant all permissions automatically in one step

Step 6: Enable accessibility permission (manual step)
One-step permission granting (outside the app)
Important: This step is handled by Android itself, not by the app.
When the app requests system permissions, Android shows a single confirmation dialog. Enter your device PIN (or password) once, and Android grants all required permissions in one step:
- Screen recording
- File storage access
- Camera & microphone
- Internet access

Accessibility service granting (manual step in Android Settings)

Accessibility permission cannot be granted automatically — it must be enabled manually in Android Settings. The app will guide you through this process:
- Tap the "Enable Accessibility" button in the app
- Android Settings will open automatically to the Accessibility menu
- Find "Activity Recorder & Tracker" or "com.securityscreen" in the list
- Tap on it
- Toggle the switch to on
- Tap "Allow" on the permission warning popup
- Press the back button to return to the app
Why accessibility? This permission allows the app to detect when apps open or close and when the screen unlocks — essential for automatic recording.
Step 7: Configure recording settings (optional)
The app is ready with default settings. You can customize if needed.
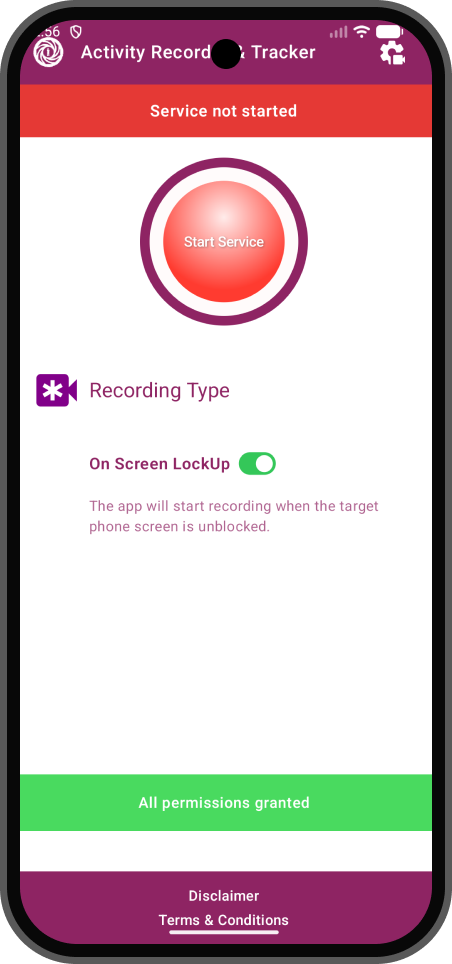
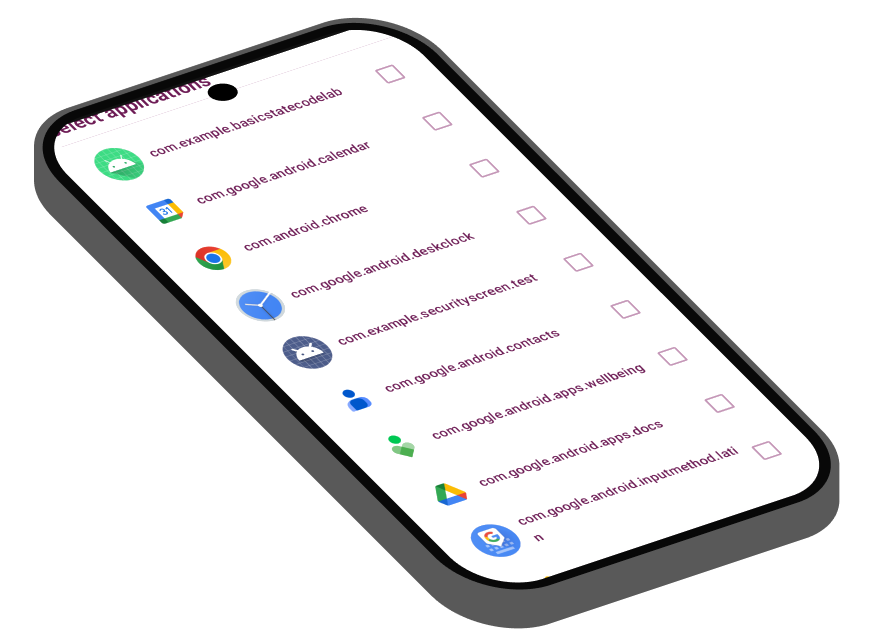
Choose recording trigger
- On Screen Unlock (default): Records whenever the screen is unlocked
- In Selected Apps: Records only inside specific apps you choose
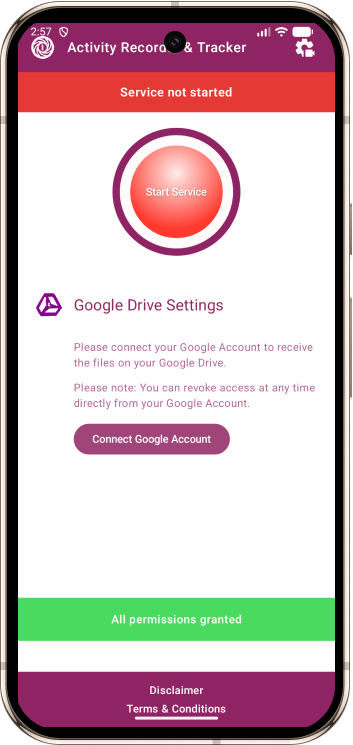
Step 8: Connect Google Drive (recommended)
Connecting Google Drive enables automatic cloud backup of all recordings. This step is optional but highly recommended.
How to connect Google Drive
- On the main page, tap the "Connect Google Drive" button
- The Google sign-in screen will open
- Enter the Google account where you want to receive screen recordings. Do not use the device’s default account if you need more space — use a new account or an empty Google Drive account when possible. You will be asked for the account name and password.
- Review the permission request (the app will access only its own folder)
- Tap "Allow"
- The app will create a folder named "Activity Recorder & Tracker" in your Drive
Privacy note: The app developers have no access to your Google Drive. Files go directly from the device to your cloud only.
Upload settings
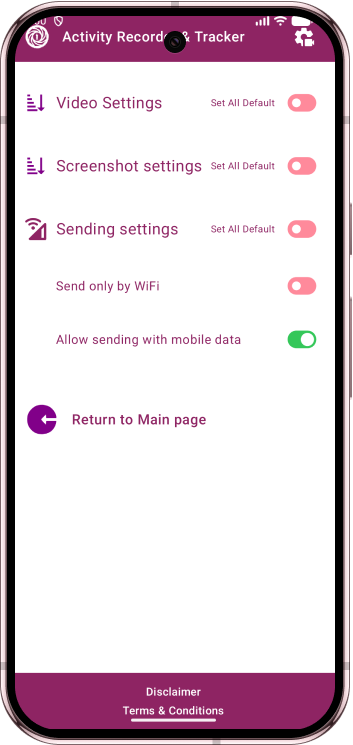
- WiFi only (default): Uploads only when connected to WiFi (saves mobile data)
- WiFi or mobile data: Uploads using any internet connection
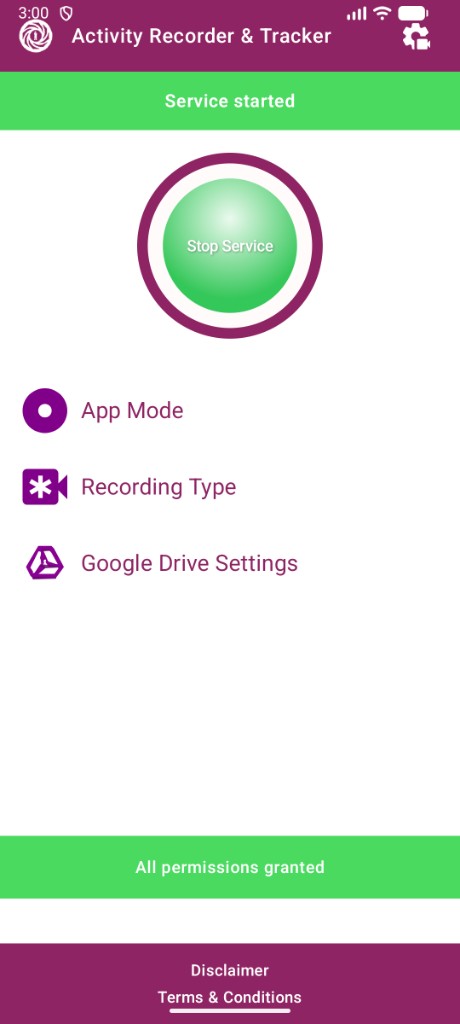
Step 9: Start recording services
- Tap the large "Start Services" button on the main page
- The button turns green and displays "Stop Services"
- The app is now actively recording based on your configured settings
Success! The app will now record in the background automatically. It will restart when the device reboots.
Step 10: App hides automatically
After services start, the app automatically becomes invisible:
- The app icon disappears from the home screen and app drawer
- The app name changes to
com.securityscreen(appears as a system app) - No notifications or visible indicators during operation
- Automatically restarts on device reboot
How to access the app later: Go to Settings → Apps → App info → find com.securityscreen → tap the "Open" button.
Verify everything is working
Check recording status
- Access the app from Settings → Apps →
com.securityscreen - The button should show "Stop Services" in green
- Permissions status should show all permissions granted (green checkmarks)
Check recordings are being created
- Use the device normally for 5–10 minutes
- Check your Google Drive for the "Activity Recorder & Tracker" folder
- Screenshots or videos should appear (may take a few minutes to upload on WiFi)
Common installation issues
"App not installed" error
- Make sure unknown sources (or install unknown apps) is enabled
- Delete the APK and re-download from the Download page (the file may be corrupted)
- Ensure you have at least 50 MB free storage space
Activation code not working
- Check for typos — copy and paste from email
- The code may have already been used on another device
App not recording
- Verify the "Start Services" button is green
- Check that Accessibility permission is enabled
- Ensure all permissions are granted (check Permissions Status in the app)
- Restart the device and check if the app starts automatically
Files not uploading to Google Drive
- Verify your Google account is connected in the app
- Check WiFi connection (if "WiFi only" upload setting is enabled)
- Ensure Google Drive has available storage space
- Files upload in batches — wait 10–15 minutes for the first upload
Next steps
About the app
Learn about all recording modes, triggers, and settings. Understand what the app records, how cloud sync works, and how to customize your monitoring setup.
Optimize your settings
Adjust screenshot frequency, video quality, and recording triggers to match your monitoring needs and available storage space.
Monitor your storage
Check your Google Drive regularly to ensure you have enough storage space. Screenshots use about 500–800 MB per hour of screen time at default settings.
Need help? Email contact@ar-tracker.com or use our contact page.
Installation complete!
Activity Recorder & Tracker is now monitoring the device. The app will operate invisibly in the background and automatically restart when the device reboots. Check your Google Drive to view recordings.
Back to Download